Recipe: Cherry
bakewell cupcakes
Source: Favourite Cakes, Bakes & Cupcakes – Good Housekeeping (Collins & Brown, 2010)
Source: Favourite Cakes, Bakes & Cupcakes – Good Housekeeping (Collins & Brown, 2010)
We recently had a laid-back afternoon tea in honour of my
sister-in-law’s birthday. There were a few flavour combinations she’d requested
for her cakes so I opted to make something containing cherry and almond. After
flicking through various recipe books, and having a look online, I opted for
these Cherry bakewell cupcakes from the Good Housekeeping Favourite Cakes, Bakes & Cupcakes book that I’d recently bought
but not yet used. If you don’t have it, the recipe can also be found here.

I increased the quantities in the recipe by half in order to
achieve a yield of 18 cakes but, other than that, the only change I made was
decorating them with flaked almonds and glacé cherries rather than red sugar
sprinkles in order to add a bit more flavour. My original plan had been to
organise them to look like flowers but, in the shop, I realised this wouldn’t
be possible since very few or the almonds in each bag were perfectly formed!
The recipe was supposed to take 30 minutes to make, 25 to
bake, plus cooling and setting time. I always allow extra time as I’m a
slower-than-average cook but, in the end, it took me quite a lot longer!

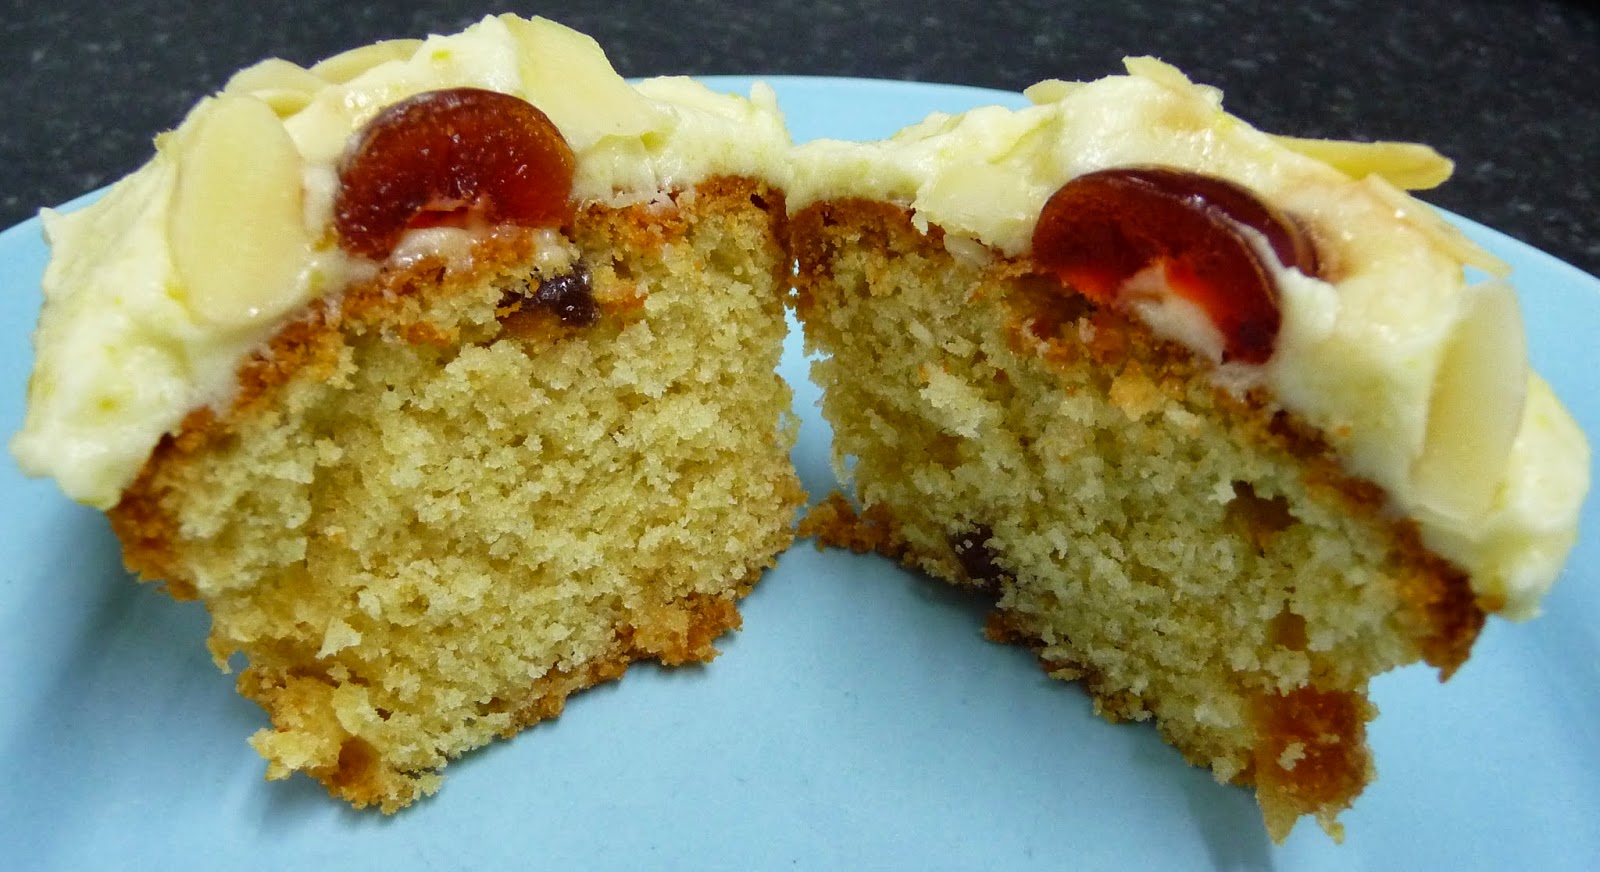
The cake itself was incredibly easy to make – I even managed
to get round the problem of needing four and a half medium eggs by substituting
one of them for a large one. (I was proud of my logic here until I realised I’d
accidentally deleted the picture of the ingredients that included them – I’d
forgotten to add the eggs in the picture I’ve posted here!) The mixture was
more doughy than liquidy so I was unable to use the ice cream scoop trick when
transferring it into the paper cases, like I had done with the Boston cream cupcakes,
but I found each one took about two very loaded teaspoons, plus an extra half a
teaspoon. The dough smelt strongly of almonds and it tasted beautiful – sweet,
buttery and nutty – I’m not sure I’ve ever licked a bowl so clean before!

The cakes did take slightly longer to cook through than they
were supposed to but this was because I had to keep swapping the oven shelves
around to make room for the extras I’d made. I accidentally let them go more
brown than golden, due to being distracted by the icing, but they were by no
means burnt and we actually found this slightly crispy top layer went well with
the other textures in the finished product. Usefully, the baked cupcakes could
be frozen prior to icing, if necessary.
The frosting was unlike anything I’ve ever done before. It
was described as ‘custard cream’ and was made in different stages: making a
custard, cooling it, adding butter, chilling it, then adding icing sugar. This
was where things started to go a bit wrong for me!

The first set of custard I made didn’t seem right at all. Having been cooled, it was incredibly thick and jelly-like. Hoping it would sort itself out when whisked with the butter, I proceeded, but despite attempting to add extra warm milk, and whisking it for a long time, it was impossible to get rid of tiny globules of congealed custard that were visible throughout the mixture. Whilst I had plenty of custard powder, milk and butter, I didn’t have enough icing sugar to risk adding it, so I chucked the custard-butter mixture and started again.
For my second attempt at the custard, I was a lot more
vigilant about the measurements, ensuring that I’d levelled out the custard
powder on the tablespoon to ensure I didn’t add too much. At first, this seemed
to make a difference but, once cooled, it again became a wobbly mass.
By this point, I was running out of time and, knowing that
the butter mixture would have to be chilled for half an hour and then I’d still
have to gradually add the icing sugar, physically decorate the cakes, and then
leave to set for an hour, I took the plunge and didn’t allow my final attempt
at the custard to cool. Instead, I whisked the butter in straight away.
Unsurprisingly, this caused the butter to melt, and the mixture really didn’t
look attractive, but I just had to hope it would all work out when I added the
sugar!
When I whisked in the icing sugar, unfortunately, the
custard still decided to form tiny globules. I had no choice but to continue
but, as the mixture became lighter in colour, these yellow flecks became more
obvious – my sister-in-law was in the kitchen at this point and asked if I’d
added lemon rind! A few of us had a tiny sample and found that it tasted
absolutely fine (nice and sugary!) and, whilst there was a slightly bumpy
texture to it, it wasn’t terrible or even that
noticeable. Once I’d added the almond and cherry topping, I was pleased
that the yellow flecks were even less obvious and, from a distance, they
weren’t visible at all.

I’m not actually a huge fan of glacé cherries but, having
made these cakes myself, they seemed a lot more appealing! The almond flavour
was a lot stronger than the cherries, and the sweet custard-flavoured icing
worked well – I felt that they really did taste like bakewell tart in cake
form, although it would have been nice if there was some jam in there somewhere
too. The cake wasn’t incredibly moist but, particularly with the icing, it
wasn’t dry either.

Everyone enjoyed these cupcakes and, looking back, I should
have stuck with the first batch of icing as it ended up making no difference
whatsoever. Like I’ve found before, my three year-old nephew tucked straight
into the icing but, what surprised me was he also ate the cherry and almond
topping and, once the frosting had gone, he proceeded to eat the entire cake.
It was pretty big for such a small person and I’ve never known him so quiet for
so long – nothing was coming between them!
Although my experience with this recipe wasn’t the best, the
end result felt worth it and, knowing what I do now about the icing, I would
happily make these cupcakes again in less than half the time.
Technically, the 405 calories-containing cakes could be kept
for two to three days in an airtight container in the fridge, but we found they
tasted a lot fresher on the day they were made.
Ease of recipe: 8/10
Finished product: 8/10
Overall score: 8/10
Bake again? Yes
Finished product: 8/10
Overall score: 8/10
Bake again? Yes

My boyfriend would love these, I might make him some if he's nice! x
ReplyDeleteI hope you both enjoy them if you do :) Let me know if you discover the secret to a lump-free icing!
DeleteYum my favorite, thanks for sharing this fantastic recipe.
ReplyDeleteSimon